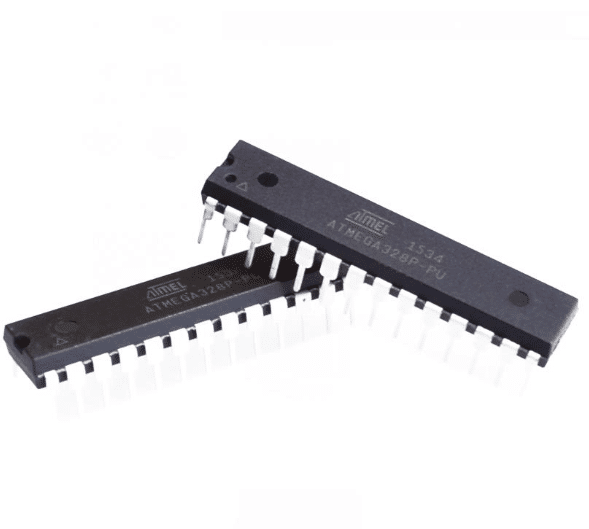
ATMEGA 328p-PU
R73.00 Original price was: R73.00.R45.99Current price is: R45.99.
ATMEGA 328p-PU pre-loaded with the Arduino Opti boot (Uno 16MHz) Bootloader. Atmel’s ATMega328 8-Bit Processor in 28 pin DIP package.
2 in stock
ATMEGA 328p-PU
This will allow you to use Arduino code in your custom embedded project without having to use an actual Arduino board.
To get this chip working with Arduino IDE, you will need an external 16MHz crystal or resonator, a 5V supply, and a serial connection.
If you are not comfortable doing this, we recommend purchasing the Arduino Uno board that has all of these built into the board.
The ATmega328P-PU is the same microcontroller chip used on the Arduino Uno boards and comes in a breadboard friendly package.
While they look similar, the difference between the ordinary atmeg328p microcontroller based circuit and the arduino on breadboard is the fact that, the microcontroller used for the Arduino on breadboard always carries the arduino bootloader which allows it to be programmed using the arduino IDE.
This is not the case with the ordinary atmeg328p microcontroller system as the microcontroller can’t be programmed using the Arduino IDE.
This project is very easy and shouldn’t take a lot of time to implement, but before we proceed to the tutorial, its important to explore some of the benefits and reasons for this project, especially when we could get a cheap “alternative” in the Arduino pro mini.
Some benefits of the Arduino on Breadboard are listed below with the most important one for me being the second one as optimizing power for devices is very important in design.
- Working with the Atmega328p on a breadboard will give a deeper understanding of how the Arduino hardware works.
- The second benefit is the low power consumption of this project, compared to all other types of Arduino including the pro mini, this consumes far less amount of power in standby mode. Reason for this is obviously the removal of all the other peripherals that comes with other arduino board.
- Its easier to scale an electronic prototype implemented using the arduino on breadboard as you are privy to every detail.
Only logged in customers who have purchased this product may leave a review.
Related products
DIY Kits

Reviews
There are no reviews yet.